


Author: Ryan
New Downloads for March, 2019


New Downloads for September, 2018


New Downloads for August, 2018


New Downloads for April, 2018


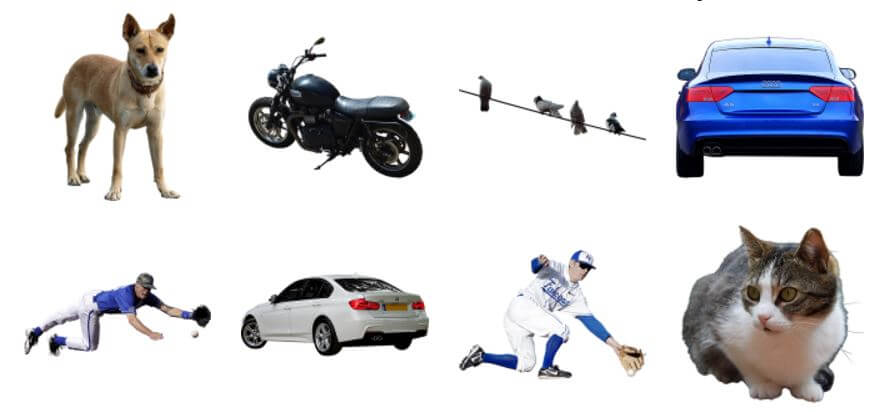
New Downloads for February, 2018
February can be a cold month here in the Northern hemisphere. Here’s a month of downloads all in one place to keep you warm!


New Downloads for January, 2018
For your convenience here is the last month of cutouts all in one place. Happy New Year!!


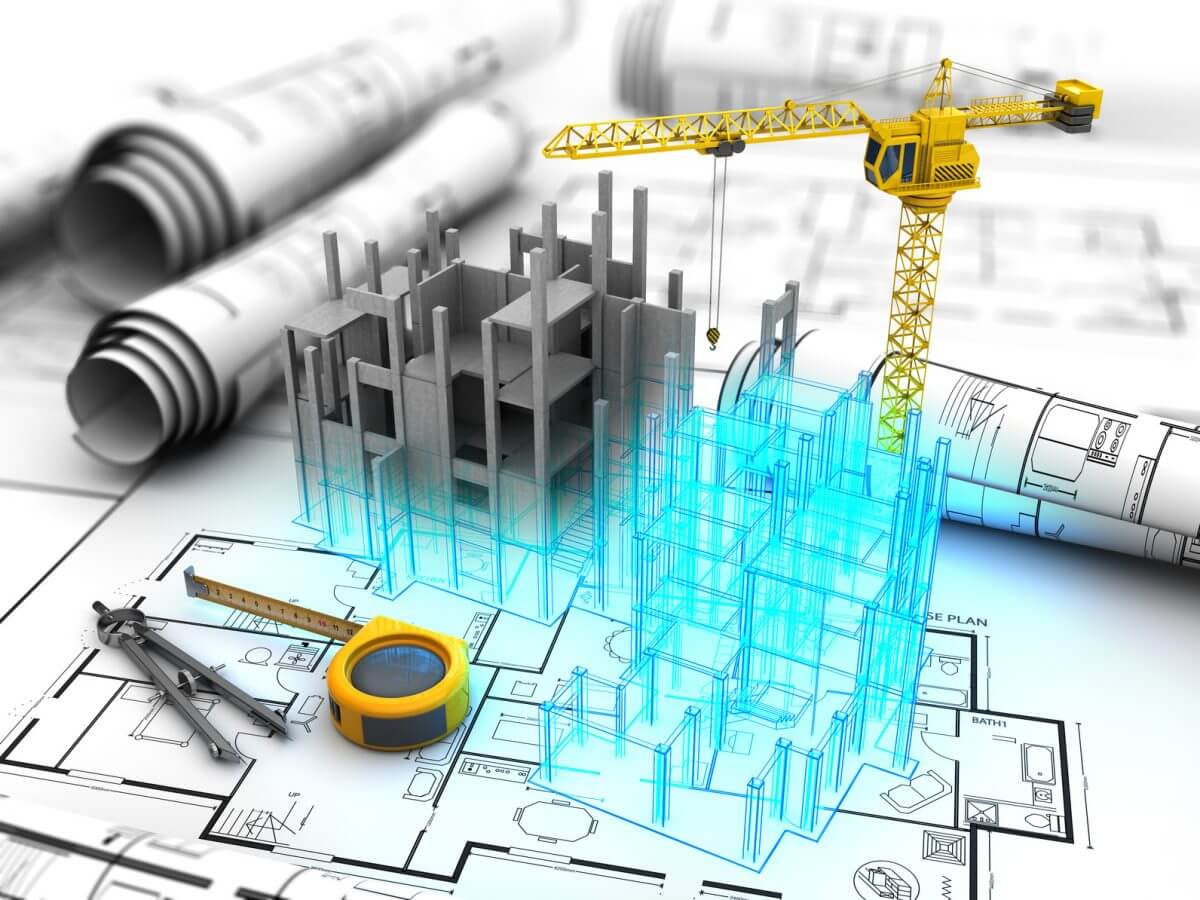
Creating a Sky for Your 3D Architectural Visualization


The perfect sky has a lot more power in your 3D architectural visualization than you realize. Learn how to create the perfect sky for your rendering here.
Creating the perfect sky can be difficult. But, when the sky is done correctly, your 3D architectural visualization will be balanced and appealing to the audience.
Not sure how to create the perfect sky? No problem! Keep on reading to learn how to give your work a finishing touch that will give it appeal!
Creating the Perfect Skies for 3D Architectural Visualization
Types of Skies
There are 3 types of skies that you can utilize to create the best 3D architectural visualization out there. These types of skies are:
1. Solid Color Skies
The easiest way to create an amazing sky that will compliment your 3D architectural visualization is to utilize a solid color. This can be done by creating a layer behind the drawing that is of light shades.
Mask the sky color’s layer or choose the area where the sky will be, add a new layer and your color to get the sky’s color behind your visualization.
Or you can even color over the drawing and mask the color. By utilizing this technique you will avoid having to completely redo the sky’s layer if you happen to move something during rendering and can simply redo the color layer’s masking.
Adjust the layer’s opacity to help get the best intensity for your visualization.
2. Dusk Sky
Using a color gradient, overlaying with pictures, and using opacity and layer masks will help to create a realistic sky within your 3D architectural visualization.
This is done by:
- Choosing a gradient layer/ placing background picture
- masking the gradient layer or picture in the background
- Importing the picture you wish to use while adjusting the size, opacity, and mask
- Additional pictures can be added and the previous layer duplicated, resized and even mirrored to help create the perfect combination sky look.
3. The Color Gradient Skies
These skies can prove to be difficult to make successfully in Photoshop.
What you need to do for this method is:
- Create a layer
- Select the gradient tool
- Choose the color and fill you would like
- Choose from radial, angular, reflected, and diamond gradients to specify how the start and ending points will affect the gradient’s appearance.
- Specify the blending mode and opacity
- Adjust the gradient angle and gradient amount
Some Things to Avoid
Oversaturation
A common problem is oversaturating the skies. Enhancing or amplifying the skies to catch the audience’s attention is often seen to overpower colors that are in the architecture and ground planes. This ruins the illustration’s hierarchy.
Thankfully, this problem can be fixed fairly easily. All you need to do is move the saturation slider to left, removing some of the colors.
Unnatural Coloring
Similar to oversaturation, having an unnaturally colored sky can throw off the hierarchy of the image and make it difficult to have a successful composition.
The use of unnatural colors also creates a “Photoshopped” look that takes away from the harmony between the sky, ground plane, and the architecture.
It is easier to simply find another sky to use rather than trying to fix this problem. But, if you enjoy the formation of the clouds, you can always desaturate the color and use another sky’s color on top with an overlay.
Overly Busy Skies
Clouds, although interesting, can hurt the image by taking the attention that should be on your 3D architectural visualization and putting it towards the sky.
While adding drama to your visualization, be sure you take into consideration the clouds and the piece as a whole. The fine line between drama and distraction is one that can be difficult to spot but should not be crossed.
To make cloudier skies, dilute the image, desaturating the color and fading out details to create a softer looking texture. A simple way to do this effectively is to find another sky, one without
A simple way to do this effectively is to find another sky, one without clouds and set that color as the base sky. Then, you should take the cloudy sky, set it on top of the colored sky and lower the opacity to give the clouds a lighter look.
Wrong Direction of Light
An image with the light in the wrong direction will only set off alarms that tell the audience something is off. Although the problem is not clear, it is simple to fix that helps the 3D architectural visualization to read much better.
Keep in Mind
Perspective
Keep in mind the perspective of the 3D architectural visualization. Scenes that show a lot of depth with look better with a sky showing scale. Without this, the background will look much flatter and less appealing.
Simplicity
Clouds don’t always need to be in the sky of your visualization. Sometimes, just using a gradient is all that is needed to create an image with the perfect tone.
Without the use of clouds, the image becomes calmer, helping to highlight the visualization of the architecture and ground planes.
Other Techniques to Consider
Rather than using a simple blue sky, a quick and easy way to enhance your 3D architectural visualization is to create a black sky.
The h5 contrasts will be far more interesting and appealing to the audience than a simple blue or gray sky.
However, if you utilize this technique, you must be careful with the black spots that will appear throughout your picture. Using Silver Efex Pro is one way that can better convert your images to black and white. However, it is not necessary for this technique.
Conclusion
Skies can pull your pieces together or break them apart. Be sure you think about the image carefully, considering all your options, and the problems that are associated with each.
Want to create the best 3D architectural visualization possible? We provide instant and unlimited access to the catalog of high-resolution images and are backed by Amazon’s cloud services. And without limits, there is no one better to sign up with!
Need more help with your artwork? Check out our blog or give us a shout! We are more than happy to help in any way we can!
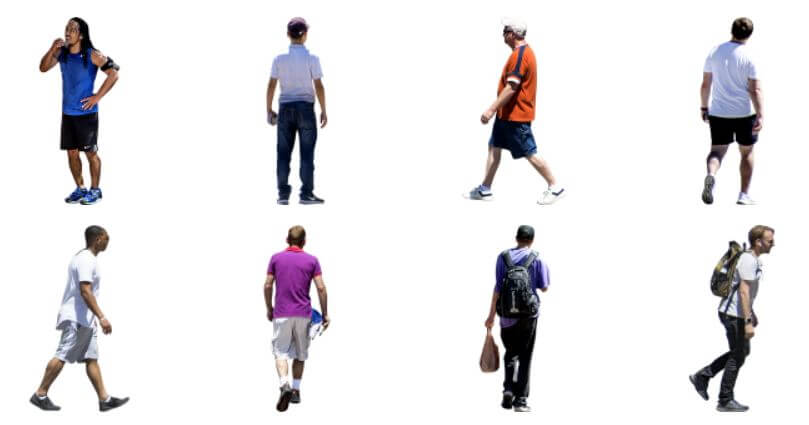
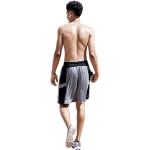
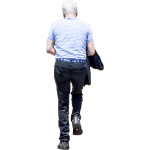
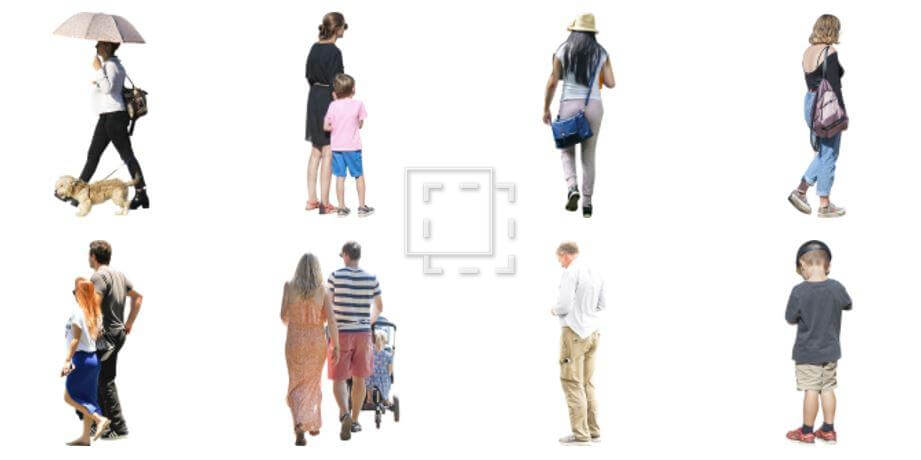
The Use of Human Figures for Architectural Renderings


People aren’t just simply placed in architectural renderings, they tell a story or serve a purpose. Learn about human figures for architectural renderings here!
Have you ever looked at renderings for a new urban development project or other major venue and thought for a moment that it was a photograph?
Looking closely, even the human figures for architectural renderings look like they’re actually there, in the scene.
Architectural renderings have gotten so detailed, that in many cases you can no longer tell what’s real versus what was created on a computer screen.
Even hand-drawn renderings are often painstakingly detailed to the point of perfection.
How do architectural artists pull off this trick?
A Matter of Perspective
There’s one thing that all successful artists have mastered, and that’s perspective.
And no, we’re not talking about existential “meaning of life” perspective.
It’s the more concrete, how you literally see the world around you, perspective.
To make a scene seem believable to your audience, add a sense of perspective to your architectural rendering.
Don’t just draw a building head-on, or from above. It’s difficult to relate to the concept that way because that’s not how we see it in everyday life.
Picture yourself standing on a street corner (or better yet, go outside or look out a window for a moment). Staring straight ahead, think about the angles you’re seeing in the road, buildings, lamp posts, etc.
Seeing things from that angle, and translating that in your work, adds a whole new level of depth.
But that’s not the only consideration when creating new designs.
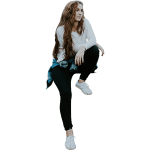
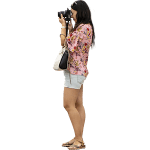
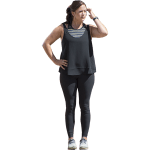
Human Figures for Architectural Renderings
Adding realistic elements to an architectural sketch can make all the difference between a believable image and a simple picture.
Think about the last time you went to a park or any downtown destination. Were you the only person there? Probably not.
People add dimension to a location, even if that location technically doesn’t exist yet.
Without people, the picture looks empty and incomplete.
If you’re drawing a busy street corner, you need to add those bustling people to the frame to really convey that level of energy.
Even if you’re creating a new park concept, why will people go to this park when it opens? Show your audience what they can do once they get there.
Have a person reading on a park bench.
Maybe there’s a group of people playing Frisbee.
Is that a bike path or a jogging trail? Show us it’s a bike lane by incorporating people riding their bicycles.
By showing people how they can use a space, they’ll be more likely to think of themselves going to this new venue and taking advantage of what it has to offer.
Human figures for architectural renderings also serve another purpose – they help add scale.
What this means, is that sometimes it can be difficult to visualize how large or small an area actually is. Providing scaled images of people helps your audience see how they’ll fit in relation to the space.
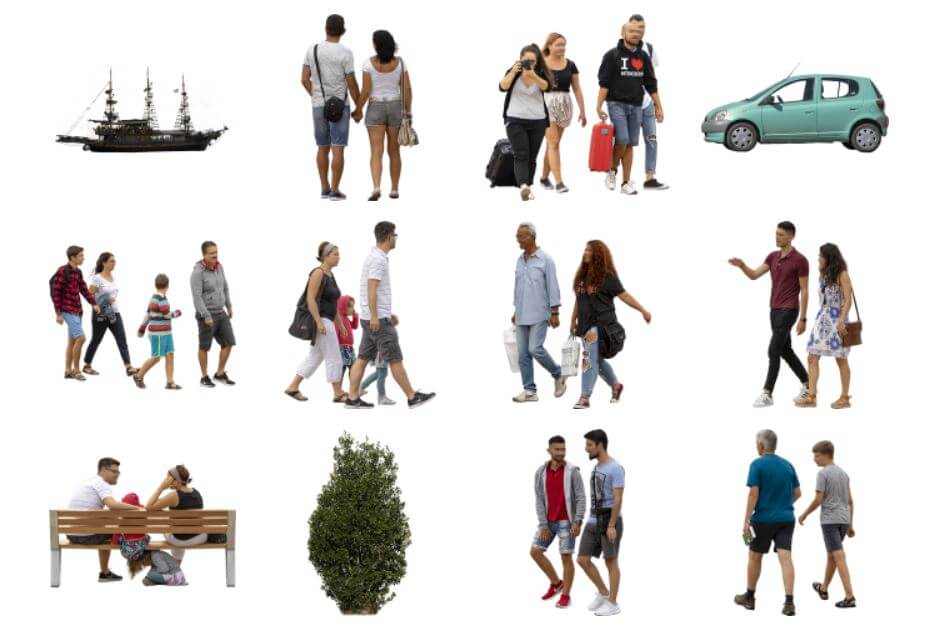
How to Add People to Architectural Renderings
First, you’ll need to create the base of the architectural rendering itself – this is the hard part (it’s also where perspective comes into play). So once you’ve gotten a good handle on that, the rest should be easy.
While you could technically create human figures for architectural renderings from scratch by hand or using CAD programs, there are easier options at your disposal.
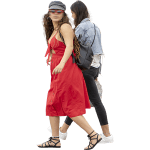
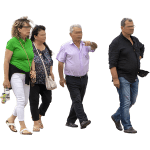
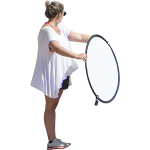
Look for an online image database of people.
You can search for individual people walking, bicycling, or performing a variety of other tasks. You can also look for images of groups of people, which can make something like a street scene easier since you don’t have to pick people out one by one.
Consider Your Audience When Choosing Images
Adding humans to your architectural renderings will definitely improve the drawing, but it doesn’t end there.
Many architectural sketches lack diversity, but the world is a diverse place!
It can be easy to pick out the first few images you find that will fit into your design, but consider whether they will fit your entire narrative.
People from all backgrounds need to see themselves represented in order to picture themselves actually being there.
Don’t neglect a swath of people without a second thought. Be sure to represent diverse populations in your architectural renderings.
Other Ways to Make Architectural Renderings Stand Out
Adding human figures for architectural renderings isn’t the only way to improve the realism of your design.
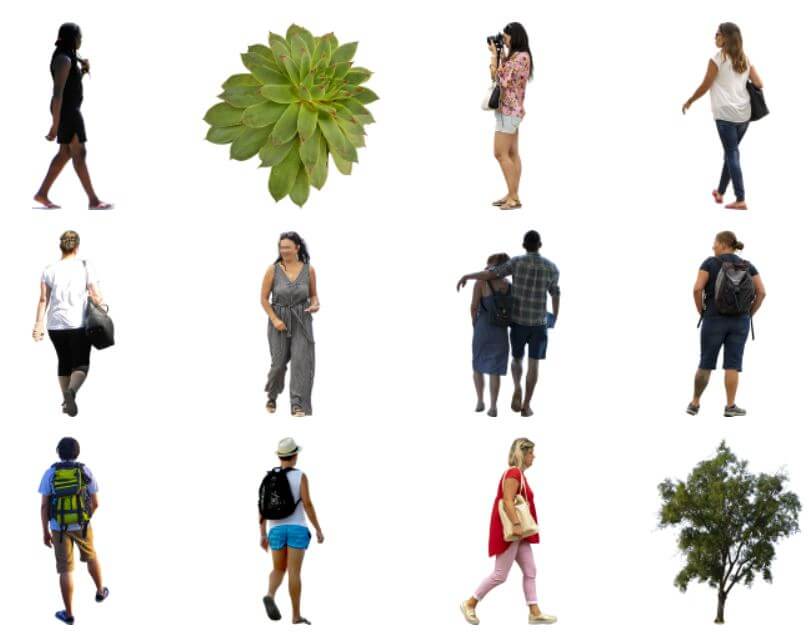
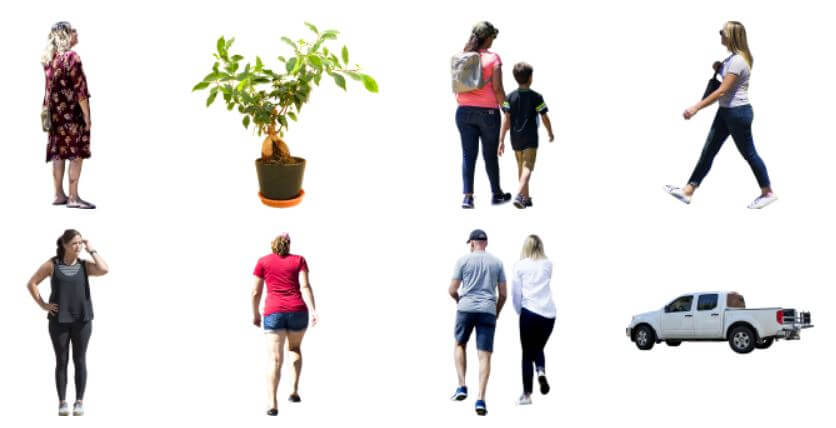
Think about elements in nature that can further add to your draft.
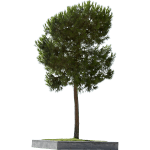
The best architectural renderings often feature trees, grass, and even seasonal additions like snow or fall foliage.
If there’s a body of water, think about rippling from a light breeze, and how that might sway nearby tree branches and leaves.
Trees for architectural renderings may not seem that important, but they can add a lot to the picture. Just make sure that the type of tree included is one that can actually be found in the area!
With that being said, look for trees and plants that can add a pop of color if appropriate.
Especially in cityscapes, it’s easy to get overwhelmed by shades of gray. Adding a strategically placed planter box full of flowers can make the scene more interesting and pleasing to the eye.
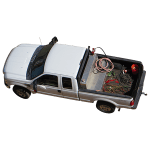
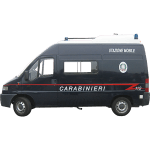
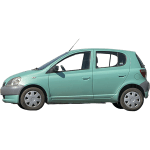
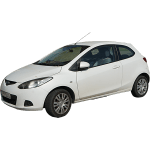
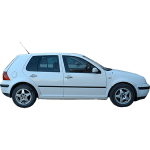
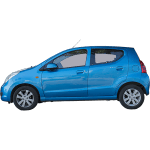
Or, if you want to add interest without as much greenery, consider adding vehicles to the rendering. Think about the location you’re drawing for, and what modes of transport are most common.
In a city, you probably want to focus on mass transit options like buses and taxis, and maybe a food truck on the corner.
In a suburban area, personal cars and trucks will be more common.
Just remember, all of these elements should be added in addition to human figures – not as a replacement for them.
Getting the Most Out of Architectural Renderings
By incorporating elements such as people, trees, cars, and other everyday visuals into your architectural renderings, you’ll be able to paint a more accurate picture of what a location will look like once it’s developed.
The style of the rendering itself is up to you – some artists prefer to hand draw while others use 3D architectural rendering models designed using software.
Either way, the goal is to help people see themselves in the picture you’re creating.
Need some help finding the right images of human figures to add to your rendering?
Check out this online image gallery of people to inspire your work!
Why Less is More in 3D Architectural Rendering

Why Less is More in 3D Architectural Rendering
The phrase “less is more” has been applied to many aspects of life. Click here to learn why “less is more” in 3D architectural rendering.
When creating a 3D architectural rendering, you might be tempted to add a lot to it.
You might think that your creation will look boring without all the bells and whistles. So you start adding more and more to the piece.
Suddenly, you have a rendering that looks cluttered and over-done.
Research shows that clutter hurts people’s ability to focus.
How can a client visualize how their structure will look if they can’t focus?
In 3D architectural rendering, less is more
The phrase “less is more” can be applied to many aspects of life.
Did you know that the phrase was originally about the field of architecture?
Robert Browning wrote the words “less is more” in his poem “The Faultless Painter” in 1855.
In 1947, architect Mies van der Rohe made the phrase famous. He used the term in reference to minimalist design.
These words became the slogan for the Modernist architecture movement.
Mies van der Rohe believed that adding too much to a design took away focus from the beauty of a structure.
Keep this in mind when creating a 3D architectural rendering.
When you fill up the space with too many extra elements, you take away from the most important part of the design.
Don’t start to worry that “less is a bore”
Robert Venturi made up this phrase in response to Mies van der Rohe. “Less is a bore” is about the Postmodernism architecture movement.
You might prefer your architecture to be sleek and minimalist. Perhaps you tend to like Postmodernism where the architecture has more details and character.
It doesn’t matter whether you are designing a 3D architectural rendering for a Postmodern or Modern structure.
You should forget about the phrase “less is a bore.”
When you put together a rendering, you should only add details that your building needs so it can come to life.
Say, for example, you are designing a huge building on a school campus.
Your rendering should reflect that world. There should be cutouts of trees and students.
Though only enough so your client can start to visualize the final product.
Adding more cutouts than you need won’t make the rendering more interesting.
It will start to look cluttered and your client will have too many things to look at.
If you’re confident in your work, don’t hide it behind extra details
You’ve put in all your time and energy into designing the main structure.
By the time you present the 3D architectural rendering to a client, you should feel confident about what you created.
You should want it to really stand out.
Add too many cutouts and your client might start to wonder:
“Are they not very confident in their design?”
“Are they trying to hide something behind all these cut outs?”
It is important to have your skill be the only thing on display. Your design needs to show clients that you are the only person for the job.
To create a beautiful 3D architectural rendering you have to have a lot of talent
Your clients probably don’t know that. To them, this small work of art just appeared.
They have no idea what goes into making a display like this.
They hired you to make it look easy.
When you present your rendering to a client, they’ll need to focus.
First, they’ll take in the rendering as a whole.
This is when cutouts are important. They will help make the rendering come to life.
Your client will begin to visualize in their mind how it will look in the real world.
From there, they should take in all the small details of the structure you have created.
That way they can begin to understand the skill and talent you bring to the project.
Maybe the client will be able to see your talent even though you’ve added too many extra elements.
But will they trust your judgment if you do?
A smart client will notice right away if you have taken a “more is more” approach to your rendering.
That might make them reconsider your judgment.
They might begin to wonder if you really have an eye for the “big picture.”
You don’t want the client asking themselves questions that could make you lose the project.
Questions like:
“Why did I notice that the rendering was over-done but this expert didn’t?”
You don’t want to be asking yourself that same question when you lose the account.
How do you know when you’ve added too much to your 3D architectural rendering?
You’ve been working on this presentation for a while. From the original design and blueprints to actually creating the 3D rendering.
Finally, you’ve made it to the end where you’re just adding finishing touches.
At this point, you and your team might have lost a little perspective.
This is a great time to bring in an outside pair of eyes. Someone you trust.
They can see the final product as the client will see it. If they find that it seems a little cluttered, you can easily remove a few elements.
You might not have time for that if you started second guessing your rendering last minute.
In that case, these words by Coco Chanel apply to more than just accessories:
“Before you leave the house, look in the mirror and take one thing off.”
If you aren’t sure if you’ve added too many extras, be cautious and take out thing out.
Or two!
Put yourself in the shoes of the client. Try to pretend like you know nothing about architecture and imagine how your rendering might look to them.
Remember, cutouts are an important addition to a rendering.
You just need to know when enough is enough!
Do you agree that “less is more” when it comes to 3D architectural renderings?
Let us know your thoughts and experiences in the comments!
Meanwhile, if you are creating your own 3D rendering, you can download our cutouts.
You can easily locate the perfect image with our search engine.
They aren’t just for architectural renderings, either.
Immediate Entourage cutouts are great for interior design renderings, photoshop projects, artwork and graphic design!
Taking Your Architectural Rendering From Day to Night
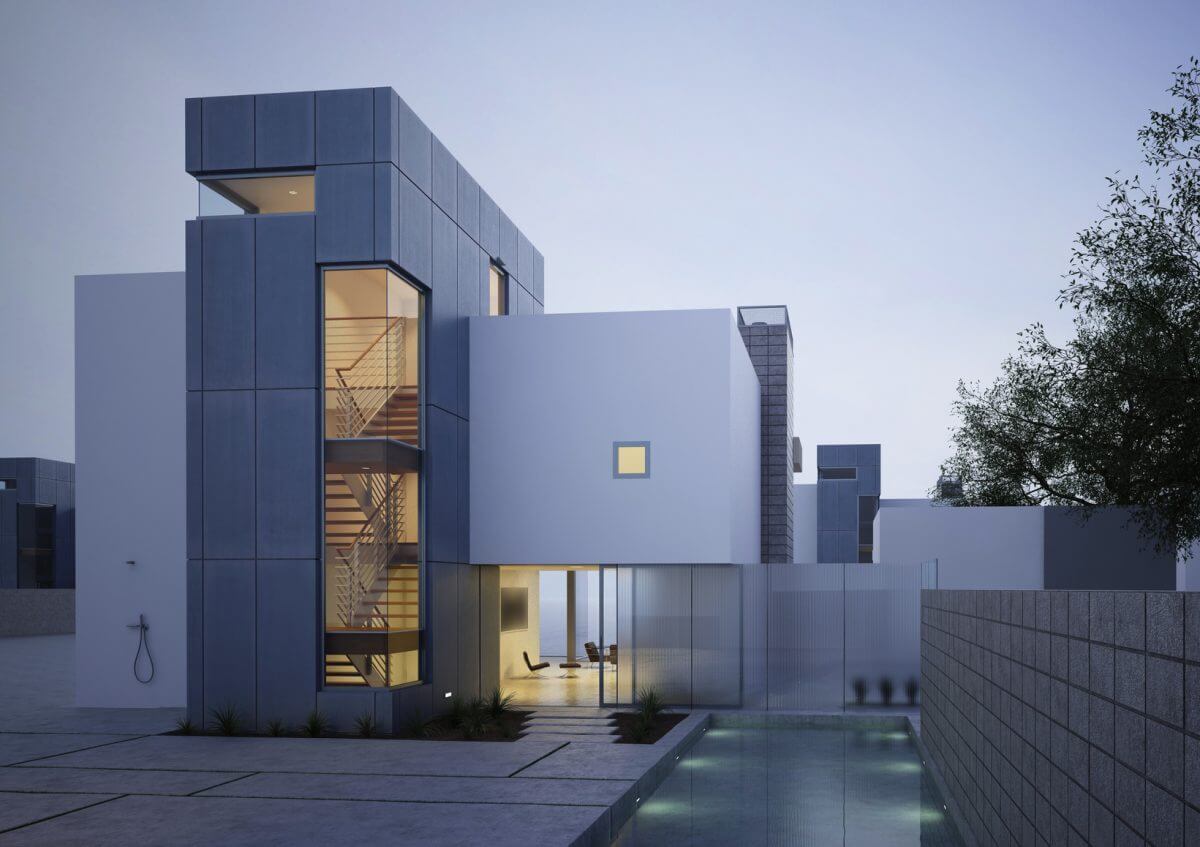
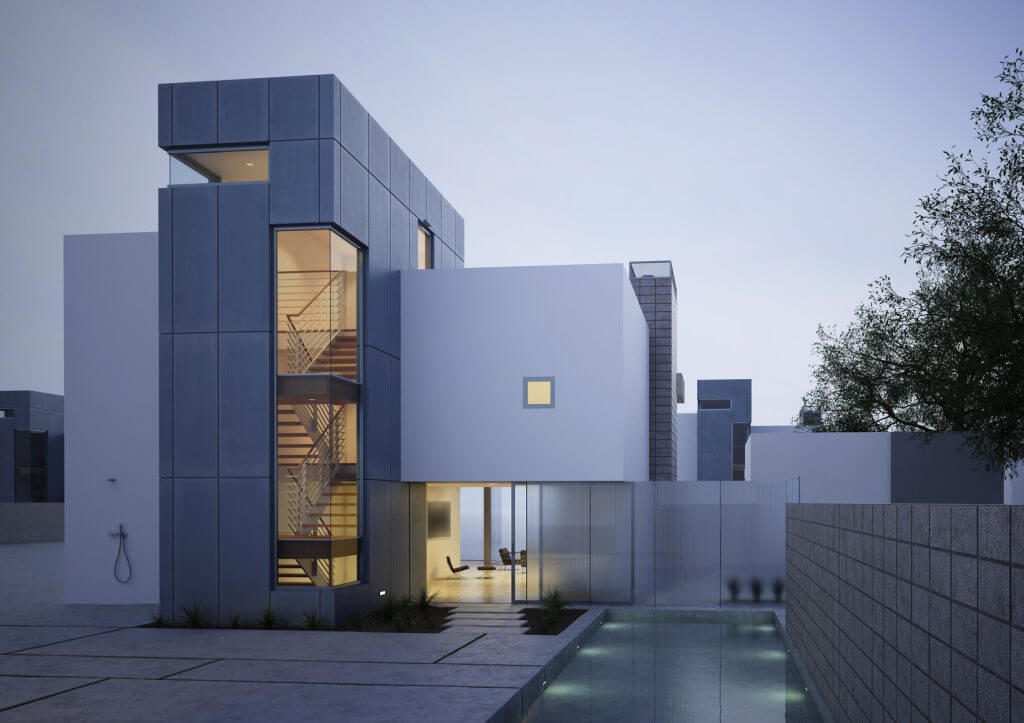
Taking Your Architectural Rendering From Day to Night
The time of day or night can make a profound difference in your architectural rendering. Click here to learn how to take it from day to night!
Sometimes you need to turn day into night.
Especially when you’re trying to take your architectural rendering from day to night.
You want to impress your clients or professor but you know you won’t achieve the same look if you use the same image taken at night.
Why? Because the time of day or night can actually make a profound difference in your rendering.
And if that perfect image can only be taken during the day, you need the right tools to turn day into night.
So let’s learn all about architectural rendering using Photoshop to turn day into night.
What are Architectural Renderings Used for?
There are a lot of reasons to use a rendering.
The most common uses are for marketing, presentation, and design analysis.
Here are the most common reasons why an architectural student or professional might find architectural rendering useful.
- 3D Walkthrough and flybys
- Still renderings
- Virtual tours
- Floor plans
- Photorealistic 3D renderings
- Realtime 3D renderings
- Panoramic renderings
- Renovation renderings
- Light and shadow renderings
The best program to achieve the results you desire to turn day into night is to use Photoshop.
Let’s learn the best steps to take and resources to use when turning your architectural rendering from day to night.
What Architectural Renderings Work Best When Switching from Day to Night?
Not all images will work well for this type of architectural rendering.
The images that are best to use in a rendering are when:
- Highlights are not blown out
- Highlights are not overexposed
- There’s a clear separation between sky and foreground
- There’s a sharp and direct light source
Using images that contain these issues will make the project take much longer and may not end with the desired result you’re looking to achieve.
Turn off Layers
The first step is to turn off certain layers in the original daytime scene that may not necessarily belong in your evening scene.
Turn off such daytime layers such as:
- HDR effects
- Warm color overlays
- Fog
- People
- Cars
To turn off layers you:
- Hold down Alt (in Windows)
- Option (for Macs)
- Click the layer visibility icon
Do a Curves Adjustment
This will help you darken the image a bit.
After all, if you’re doing an architectural rendering that’s supposed to be an evening image, you can’t have natural daylight.
To do this you: Create a Curves Adjustment Layer (Layer > New Adjustment Layer > Curves). Then adjust the sliders.
Dragging the curve down will darken the image.
Sharp Shadows Should be Removed
The shadows caused by the sun will most likely be one of the more difficult features to remove.
However, using the photoshop tool “Clone Stamp Tool,” you can edit the sharp shadows out.
Since trees tend to be their own layer, often you can simply take those out rather than having to use the Clone Stamp Tool.
Removing these sharp shadows is essential. It will otherwise confuse the viewer who isn’t expecting shadows to appear at night.
The Image Should be Darkened with Blue and Black
This is kind of a no-brainer. After all, we’re turning day into night so things should get darker.
Luckily, this is a rather easy step.
For your architectural renderings here’s what to do for the blue nighttime tint:
- Fill canvas with blue paint (Layer > New Adjustment Layer > Color Balance)
- Set layer blend mode to “multiply”
- Mask out blue so sky and interiors can show through
- Darken any clouds
You may not wish to darken the sky itself. Often there isn’t much of a difference and you might want to contrast the lighter sky with darker buildings.
However, if you want to go darker you can create a new layer by adding black.
Here’s how:
- Hit Contol + Shift + Al + N and fill it with black
- By lowering the opacity of the layer to 44% it will make the image even darker.
Desaturate the Colors
Colors at night are less vibrant.
Editing the coloring will help you pull out more detail.
It will also add more contrast to the architectural rendering and darken it a little more.
To change the vibrancy from daytime colors to nighttime colors in your renderings you:
- Add a hue/saturation adjustment layer by going to (Layer > New Adjustment Layer > Hue/Saturation
- Drag the saturation layer to left to decrease the saturation of the daytime colors
- Lower the opacity to 46%. This will leave some but not all colors still noticeable.
Lighting Should be Added
You want to enhance lighting in certain areas of your rendering.
You’ll have to manually paint light into the scene.
You can use lighting for:
- Highlighting underneath a building
- Accent lighting
- Highlighting windows
To create light coming from a window:
- Create a new layer
- Use a round brush to paint between the frames of the window. Choose a white or nearly white color to give the appearance of light.
- To add glow use a round soft brush and yellowish paint
There are also some features you can add to give the appearance of nighttime.
Here are some ideas that might help enhance the image.
Create an Appearance of a Wet Ground
Adding a wet ground when turning your rendering from day to night can achieve several desired results.
Wet pavement can:
- Add complexity
- Engages viewer
- Adds drama
There are other features you can add to create a contrasting look. It’s just a matter of finding the right images to enhance your rendering.
Add or Subtract Objects
You can add objects to your architectural rendering to enhance the mood you’re trying to capture.
Adding raingear and umbrellas to a wet night scene adds to the feeling of the wet weather while not distracting the viewer with close up views of the individual people.
You may also want to subtract the sun and add in the moon to your nighttime scene.
It can also activate the scene you’re showing.
Subtracting items from your rendering can also help lessen the distraction of the work.
How Long Might a Typical Architectural Rendering Project Take?
It depends on what the project is.
For exteriors where turning day to night it may take:
- Small Building: 1-2 days
- Standard House: 2 days
- Skyscraper: 3-15 days
- City: at least 15 days
Whether you’re a student or a professional architect, it’s so much easier to complete assignments when you have the right tools.
One of those tools is having the right images at your disposal. We’ve compiled them conveniently for you to use, at the price that works best for you.
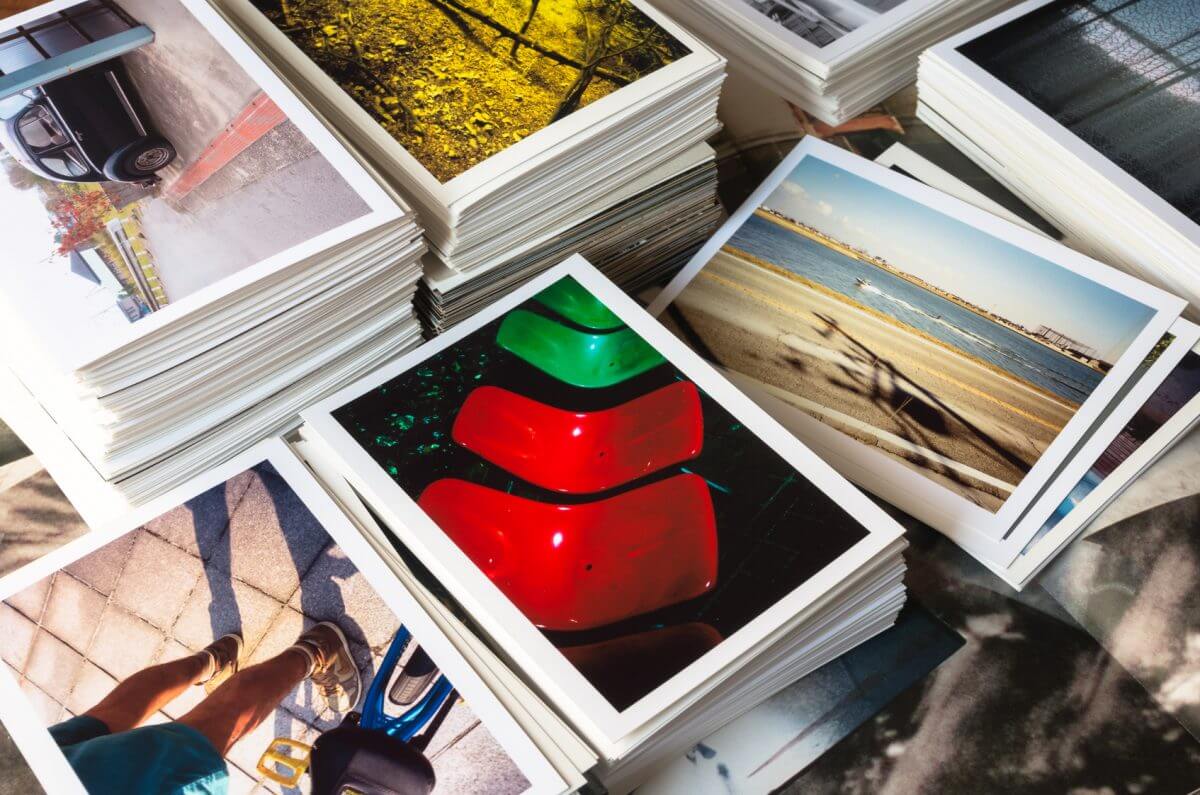
Choosing the Best Stock Photos for Your Project


Choosing the Best Stock Photos for Your Project
You want your stock imagery to look natural in your project, so it takes some careful thought. Read on to learn how to pick the best stock photos for you.
Why does it seem so hard to find the best stock photos for your project? After all, the internet provides us with so many options.
More than 600 billion photos are uploaded to the internet every year. There are bound to be some good stock photos in that gigantic pile, right? Right?
Sure, sorting through endless stock photos can be fun. But for some of us, stock photos are serious business.
Deciding between several photos can be difficult, and it may be even harder to find the right one. If you want to learn how you can choose the best stock photos for your design project, keep reading.
How to Search for the Best Stock Photos
As a successful designer, you’re always striving to do your best on every project. You’re well aware that the perfect stock photo can put your work over the top.
But the process of finding the best stock photos starts with conducting great searches.
When sifting through stock photos, make sure to take your time, and don’t rush the process. The best stock photos are rarely a last-minute decision. Besides, it no longer takes as long as it used to find relevant images.
Here a few tips you can use to save some time during your search for photos:
- Take advantage of advanced search filters. Advanced search filter settings may vary from site to site, but these tools help you cut through the noise.
- Be specific in your searches. In some cases, broad search terms are best. However, most of the time, using broad terms will lead to you wasting more time sifting through more images.
- Use the “exclude keywords” feature. This is a great way to further narrow down your searches.
- Sort results by relevance. Looking at the newest stock photos might seem appealing, but it’s not always best. Sorting your searches by relevance will get you closer to your goal.
- Search for related terms, not the full title. For instance, if you’re looking for something related to speed, you can search for an image of a fast car. Get as creative as you can.
- Use a thesaurus if you need to. Maybe you can’t think of a related term off that top of your head. If that’s the case, just use an online thesaurus to assist you in your search.
If you find your ideal photo right away, great! However, don’t settle for less. Choosing the best stock photos is critical.
Pay Attention to Contrast
Once you narrow down your search to a few photos that are relevant, you should start paying attention to specific details.
One most important factors you should consider is the contrast of your stock photo.
Ideally, you want your text to have high contrast with your image.
If you’re using white text, the last thing you want in a stock image is a lot of white. Conversely, you don’t want to use dark text with a dark image either.
So what is the best way to determine the color of your text?
You can refer to the color wheel for help. Try to use colors that are on opposite sides of the wheel in order to create a contrasting effect.
For instance, if the primary color of your stock photo is blue, you can use a complementary color like orange for the text.
But sometimes you will have trouble finding stock photos with good contrast. Furthermore, you may run into stock photos that are just too good to ignore.
So what do you do in this situation?
If you find yourself in either of these two scenarios, don’t fret. If you really need to, there is a way to get around this issue: color cast.
Color cast has become a very popular strategy for modern designers. It can be an extremely effective strategy for those trying to create contrast.
However, don’t force it. If color cast doesn’t flow with the rest of your page, opt for other photos instead. You can also blur the image if you wish.
Consider Emotions and Mood
The best stock photos for a job depends on what mood or feeling you’re attempting to convey.
Obviously, if you’re aiming for a happy feeling, then it’s best to stay away from colors or faces that are gloomy. That said, it goes much further beyond this.
If you’re designing something for a brand, for example, make sure that it matches the brand’s voice. Your images must appeal to the target audience.
Most good brands want to maintain a narrative. Even though you may find an image that looks good, check to see whether it supports the message of the brand.
Don’t Forget About Orientation
Many designers seem to ignore orientation until it’s too late.
Why is this step important?
Well, if you take care of this during the selection process, you won’t have to clone parts of the image in order to fake it.
So what orientation is best for you situation. Is it wide, tall, or square?
You can use the advanced search filters for this as well. It will make your job much easier.
There are certain things to consider if you’re designing a project for social media sites:
- Use square images for Instagram or Facebook
- Use tall photos for Pinterest
- Use wide photos for Twitter
If you find a good wide photo, you can easily crop it to suit your square photo needs. You may run into some problems, however, if you try to turn a tall photo into a wide one.
Conclusion
Choosing the best stock photos doesn’t have to be difficult. There are many ways you can distinguish great stock photos from bad ones.
You want to utilize all your search tools to find a batch of photos that could work with your project. Then you want to narrow down your list, eliminating options that don’t suit your needs.
Stock photos have a significant impact on the quality of your work, so don’t skimp on them. Put your newfound knowledge to good use and get started on another fantastic project!
If you want to make it even easier on yourself, check out our blog for the newest graphics you can use for your project.
How Stock Images Improve Your Presentation Design

How Stock Images Improve Your Presentation Design
Whatever your presentation may be, some stock imagery of people, buildings, etc. can make it look much better. Here’s how it’ll improve your presentation design
You’ve heard that old saying “a picture’s worth a thousand words.”
Well, what if I told you it was more than that?
According to MIT, the human brain processes images in about thirteen milliseconds.
That’s roughly sixty thousand times faster than word processing!
So, why then are we bombarded with text and bullet points in every Powerpoint Presentation?
I mean, we’ve all been there, right?
The presenter drones on and on with slide after slide of ugly paragraph blocks.
You don’t remember what was said.
Instead, you concentrate all your efforts on staying awake.
It’s a result of bad presentation design.
In this piece, we’re going to see how stock photos increase information retention, boost your emotional appeal, and enhance understanding.
Information Retention – The Heart of Every Presentation Design
At the end of the day, it’s all about being memorable.
It makes you look good, and your point sticks in the mind of your audience.
Studies show that sixty-five percent of people are visual learners.
They remember information better with images rather than words.
Stock photos also create an association between what’s on screen and what you say.
Think of it as a cubby hole for information storage.
For example, let’s use Smoky the Bear.
We all know his famous slogan “only you can prevent forest fires.”
Why is that?
Unconsciously, our minds have created a link between that sentence and the image of a mild-mannered grizzly bear wearing a park ranger hat.
Because you don’t often see polite grizzly bears wearing hats, the image sticks out.
It then leads your brain to the words of the slogan.
That’s great presentation design.
But be careful.
Images are powerful.
Using too many on one slide transforms your presentation into a Michael Bay movie.
Limit yourself to one per slide.
Emotional Appeal – Hit Them in the Feels
Have you ever seen a commercial for Feed the Children or Unicef?
What did you see?
Probably an image of an impoverished, starving child, right?
Do you know why that is?
It’s because the presentation design of those commercials appeals to your sense of sympathy.
It makes you sad.
It makes you inclined to donate money to help that poor kid.
It moves you.
This use of images to appeal to emotions dates back to Aristotle.
He referred to it as pathos, and it’s a great way to keep your audience’s attention, especially when you’re making an argument or a pitch.
It also helps with retention.
Think of your most vivid memory.
Maybe you were excited on your first day of kindergarten.
Maybe you were nervous for your first kiss.
Whatever the case, you likely remember that moment in detail, right?
That’s because your mind connected that moment with a feeling.
The image of that moment and everything around it stayed with you.
You can do the same thing in Powerpoint.
For instance, let’s say you’re talking about drought in California.
An excellent presentation design would be to have a slide of statistics and a stock photo of a desert in the background.
Because deserts have little life and no water, they tend to scare people.
Your audience may not remember the exact statistics, but they will attach fear to the image of the desert.
It may also move them to take preventative action.
Enhanced Understanding
Have you ever had a conversation with someone that spoke a different language?
I’ll bet it if you have, it was short.
Misunderstanding is easily the biggest obstacle to effective communication.
Incorporating stock photos into your presentation design hurdles that barrier and gets your point across.
Let’s look back at our previous examples of Smoky the Bear, the starving child, and the desert.
We know they are memorable and emotional, but what do they mean?
What’s the point of these images?
In the case of Smoky, it’s about environmental responsibility.
By wearing a park ranger hat, Smoky presents himself as an authority figure.
At a young age, most of us are taught to obey authority figures.
So when Smoky says “only you can prevent forest fires,” we understand that we need to be careful next time we go camping.
The starving child and the desert share a similar meaning.
We understand from both of these images that child starvation is a problem as is a lack of water.
Furthermore, all three of these pictures convey a message that we understand as well: these problems can be solved by you.
We know we need to act.
You can also use images for more than just sending a message.
Infographics are used on blogs all the time to package large amounts of information into bite-sized portions that people can comprehend.
If you are discussing a complex concept or process, adding a flowchart to your presentation design simplifies the concept and lets the audience see how one thing leads to the other.
It reduces the amount of text you have to type and that your audience has to wade through.
Conclusion
Pictures are powerful.
You can incorporate them as visual aids to convey a message or simplify something difficult.
Stock photos as a part of presentation design assist the communication of ideas.
They help ensure your point is made and remembered without slides of constant text.
So where can you get stock photos?
Now, that you’re on board with the influence of images, it’s time to use some.
Unfortunately, you can’t just use Google Images.
You may not be licensed to use their pictures.
Using a copywritten image without permission could land you in hot water.
You don’t want to go to court over a Powerpoint Presentation.
That’s why we’re here.
We have a catalog of stock photos available for download that’s updated weekly.
Additionally, we have several resources at your disposal so you can craft the perfect presentation design.
Got some other presentation design tips you want to share?
What are some of your favorite stock images to use?
What do you do to prepare for a presentation?
Leave a comment and share your story.
We want to hear from you.
How to Use Stock Photos in Your Photoshop Montage


How to Use Stock Photos in Your Photoshop Montage
You created a beautiful photoshop montage, but it just doesn’t seem complete. Instead of taking photos for it, read on for why you need stock photos.
So you have some great images or some great ideas that you want to present together in a Photoshop montage. But how?
Photoshop is, in a word, complicated. And there are many different ways to include stock photos into your montage, not to mention so many photos to choose from.
Where do you even start? No matter where you are in the process of creating your Photoshop montage, read on for a deep dive on how to perfectly finish it.
1. Creation Begets Creation
Before you can get to the truly creative part of making your photoshop montage, you have to create the boring stuff. Everything has to start somewhere, right?
So first, create a new file. It’s a good idea to make it larger than you plan on it being in the end, so you have a little wiggle room in terms of data. A good estimate is 20×30 inches with 150 PPI.
Then create a library of photos for your montage. The idea here is to get all the planning out of the way, so you can focus on and get into the creative flow.
Searching for inspiration? Check out some examples here.
2. Mine for the Iron
If you want to create some high-quality steel, you’ve got to first mine the iron. That’s this step: mine the stock images, and save them to your library so you can later forge them into steel.
Try at least three, but generally avoid trying to incorporate more than ten. You don’t want the image to be overwhelming. You want viewers to pay attention to the details of each image.
You can make your montage about big issues in the world, like politics, or smaller things, like ducks, because you’re super into them. Whatever you want!
3. Manage the Foundations
Now that you’ve laid down the groundwork, it’s time to work on your foundation: the background.
Double-click from your library to open an image on the canvas.
You can also use the marquee tool, and press Control/Command+A to select the whole thing, then Control+C to copy, and, after switching to the intended document, Control+V to paste to a new layer.
Make each layer/image your own by playing with Smart Filters that add to your theme.
If you’d like the edges to blur naturally together, leave the edges with some degree of transparency by leaving some wiggle room around the image when you lasso it. Add a mask, and then apply a Gaussian Blur to the mask so that the edges fade.
You can also use a template to create your Photoshop montage. This way you simply plug in your stock photos to a preset layout.
4. Add Images to Form the Body of Your Photoshop Montage
In this step, you’ll continue to make the montage, well, montage-y.
Click and drag from your library onto your canvas to add new images to the layers.
Change the position, and size, and rotate the images as you see fit. Hold shift to keep the overall proportion of the image the same, then click the save mark at the top of the page to keep your efforts.
Try to find images that are metaphorically resonant with the overall theme of your montage. Of course, if your montage is not meant to ring deep with meaningful symbolism, it doesn’t have to.
It’s your collage, after all. Maybe throw in some more pictures of stuff you like, or you think matches well with your theme or purpose.
Regardless, check out our selection of cutouts to find all manner of images to use in your Photoshop montage.
5. Cut Out And Arrange Your Images
If not already removed, you can get rid of the background of an image by choosing “Select”, and then “Select and Mask”.
Move the bits and pieces around to create the montage you have imagined or planned. Move the layers around and fiddle with sizing and filters on individual sections.
You can use size, or lack thereof, to give different elements a sense of importance or influence, and filters to lend a mood or feeling.
Regardless of your intention behind your selection and placement of images, you can play with the combination of the Opacity, masks, and modes until everything blends as you like.
To help blur images together, span some common element, such as light or color across the border between the two.
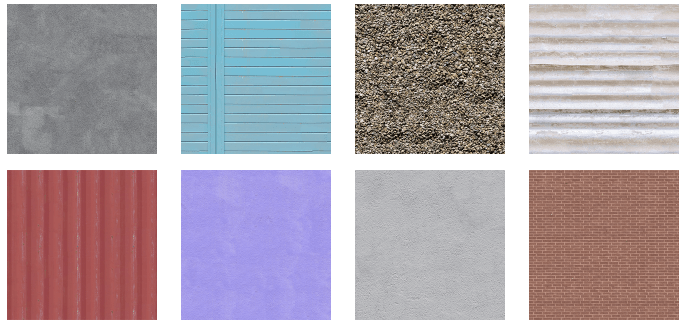
Detailed textures (think: paper, rocks, rust, condensation) work well in subtly blending the edges of images. Especially if you add in another unifying factor, like color or brightness. Check out our textures here.
If some section is still claiming too much attention or seems out of balance, you can soften the opacity by selecting the mask thumbnail, adjusting the lightness with the airbrush, and then smoothing the edges together by applying a Gaussian Blur again.
6. Get Crazy (Or Professional) With It
Expand beyond what you first imagined to include all the fascinating features the software can apply.
Play with filters, cut stock images to geometric shapes, adjust how the layers blend into each other.
If you want to, you can merge all the layers, but only do this step if/when you feel confident in the finished product, and are finished playing with the individual sections. Once you’re ready, you can make this move by pressing Control/Command+Shift+E.
Add a watermark if you want. Merge the layers again and save as a JPEG to mark it as your own, and prevent tampering to your work if you plan on sharing it online.
7. Don’t Forget to Save
Seriously! Don’t let your hard work and your masterpiece go to waste!
Questions, comments or concerns to share with us here at Immediate Entourage? Check out our Contact Us page. We’d love to hear from you!
Why You Need Entourage in Your Architectural Rendering


When presenting your architectural rendering, you want it to be as thorough for the viewer as possible. Here’s why you should include entourage in yours.
Why You Need Entourage in Your Architectural Rendering
It’s easy to assume architectural rendering is all about the architecture. It’s in the name, right?
But behind architecture, and the inherent reason that it exists is the people and the world who will interact with it.
Imagine a rendering of a single building on a blank horizon. It feels weird, right? No matter how fantastic the design, this building feels incomplete. Empty, maybe even a little creepy.
That’s because the structure lacks context, and context is exactly what entourage provides.
Not sure what entourage is, or what exactly it can achieve? Read on to find out.
What Exactly Is Entourage in Architectural Rendering?
Entourage provides the various imagery used to make an architectural rendering feel alive and populated, without distracting from the actual structure’s visual elements.
Here’s an analogy: your architectural feat is a celebrity, and the entourage is all of the celebrity’s cool clothes and accessories. The celebrity is the real talent, but the clothes are pretty important too.
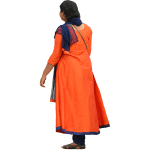
Dress your rendering up with people, plants, and animals. Don’t let your designs go naked.
The people textures often referred to as “scalies”, provide a sense of scale for the rendering (hence the nickname). Effective entourage often includes much more than just that to provide well-rounded context for the image as a whole.
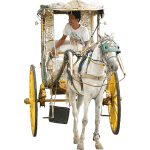
Entourage can be anything from people riding bikes, to trees, to the minutia of offices, like photo frames and computers. Some trends in modern architectural rendering even contain random features, including kayaks, fireworks, and giant butterflies.
While some entourage products have the opportunity to seem random, it’s true purpose is nearly as important as the architecture it features.
What Can Effective Entourage Do for You?
Now that you’re familiar (or more familiar) with what entourage is. Let’s move on to what it can do.
Truly effective entourage achieves a form of marketing in your rendering.
The scene you make with entourage paints the picture of a pursued lifestyle. Entourage helps represent the completeness of your design and it helps to connect by engaging with the concept behind it.
The people textures you choose to include in your rendering are going to represent the demographic for your design. If your architectural rendering is how the structure will look, then the scalies are how its consumers will look.
For example, imagine an architectural rendering for an upscale resort. Golfers and well-dressed scalies reinforce the idea of the market. Alternatively, picture families playing in an urban park or garden.
Besides creating a more realistic portrayal of how your design will look, well-chosen scalies help sell your design. The representation of a realistic demographic reinforces the idea of an active market and demand for your design.
Pragmatic entourage makes your architectural rendering appear to be a part of the landscape.
After that, all that has to be done is the building.
Why Does Representation in Entourage Matter?
According to the American Institute of Architects, women and African Americans make up less than a quarter of architects in the United States.
With such a white and male-dominated industry, it’s not hard to imagine that the representation in its production is lacking. But why is this important? Populating images are just there to represent scale, right? Why get all Affirmative Action about it?
Well, at their most basic, renderings need to realistically represent how public spaces and buildings interact with their surroundings. People of all types are an important part.
Well-done renderings will sell an appealing, believable, and modern narrative. Fair representation in your entourage is how to create that effect.
How to Find/Create Perfect Entourage Material
So you’re all up to date with the importance and influence entourage has in your architectural rendering. How do you find what you need to make your entourage as effective as possible?
Understand the intended market for your design (like the resort example from earlier), or do research for a particular region to make your entourage as fitting as possible for the location.
For example, the plants and people for an outdoor space in London would surely be different from one in Phoenix.
Our website has a fantastic and growing array of high-resolution trees, people, and vehicles available. Bonus: they’re prepared for Photoshop.
Resources are available for creating 3D renderings if you cannot find the exact item you need in order to complete your entourage.
Tools like Blender allow you to create and edit both photorealistic and more stylized 3D images.
Building images this way is more time-consuming. But it’s an option for when you cannot find the perfect component to complete the entourage in your architectural rendering.
Conclusion
Let’s review!
Entourage is basically all the stuff that makes your rendering look like it is a part of the lived-in world. Don’t create an architectural rendering that looks eerie and post-apocalyptic. Like our example above, sometimes it’s the difference between a cool famous person, and an indecent exposure charge.
If done right, including entourage in your renderings, will help you sell your designs by humanizing them, and reinforcing the demand.
Honest and realistic representation is a key part of the purpose of entourage. Without it, it cannot be fully effective.
And finally, you can find great, high-resolution, Photoshop-ready entourage of various categories on our site, or you can make your own.
5 Things You Need to Know to Create Photorealistic Architectural Renderings

An architectural rendering can really blow people’s minds. Find out our top 5 tips for creating truly amazing renderings now!
“Is that real..?”
That’s what most people ask when today’s technology tools such as Photoshop are used to create exceptional virtual designs.
Even retailers like IKEA now use photorealistic models, having once used 25% CG and are now up to 75%, instead of photography to market their products and services online.
Blurring the lines where one can’t tell if the architectural rendering they’re looking at has been designed on a computer or if it’s an actual photograph can really blow people’s minds.
Though your presentation may look as real as a photo, by adding small details, they will tell a deeper, more meaningful story and, when done correctly, are an extremely powerful marketing tool.
Whether creating a virtual tour, floor plan or populating your landscape with people or trees, we’ll show you our top five tips for creating truly amazing presentations!
Just Like a Paperback Novel
Everyone loves a good story, right?
When a tale is captivating right off of the bat, you’re curious and want to find out more.
Basic storytelling fundamentals, whether for books, television or a film, have not changed, and the same can be said for architectural rendering.
The goal is always the same: engage the audience and make them care about what you are portraying.
The first step to creating your story through your design should be understanding what goals and expectations your client has.
Finding out why they want that structure to have a certain shape or why that particular spot is being used is great for fleshing out details for the plot that your client can be guided through.
This will breathe life into every pixel of your design, increase your project’s value and allow you to rise above your rivals.
Though your representation will be an image instead of a 3,000-page novel, the design you create should be able to speak volumes without ever saying a word.
There are several ways to get a sense of what your designs should look like, such as visiting the project site where the building will be, using a drone to receive real-time aerial views as well as exploring the site to help populate the details of your project.
Now, though, you don’t have to spend the day out on the site doing a photo shoot of trees or other details to use in your project, only to then spend hours trying to get it perfect in Photoshop because there are several easy, affordable choices available online.
Amplify Your Architectural Rendering
As we just mentioned, storytelling is extremely important.
However, you don’t have to try to come up with the story for your architectural rendering all on your own.
By consulting with architects and developers on the project, you can gain insights into the creation processes which will help you to stir up ideas for your own angle for your design.
Architects are available to give advice on the building’s design and scale of the space, in order to sell the idea to the client.
Developers understand how the artwork will tie into the overall brand and help incorporate important points into the final artwork to help you make the image as engaging as possible.
Don’t Be Like Everyone Else
Seeing the same things over and over can be very boring.
Plus, if one does the same thing over and over expecting different results, that’s the definition of insanity…
To avoid insanity, take the time to wipe the slate clean first in order to tell your story on a fresh canvas. One that your client has never seen before.
Sometimes, designers use templates in order to show what developments should look like.
Templates are a horrible idea because it stifles creativity, innovation and the project’s unique vision which could cost you future projects.
Instead, make sure you’re staying true to your story with new models and let everyone else use the cookie-cutter approach. It will make you stand out while your competition blends in.
The Devil’s in the Details
Adding custom details such as lighting, textures, color or even the time of day can make all the difference between an average architectural rendering and one that is truly lifelike.
Ask yourself the following questions:
Would the building look better if it were day or nighttime?
Should the presentation have people in it? If yes, what is the demographic of that area?
For example, if you’re working on a design for a startup, the people in that model should be dressed casually and the workspace should be open areas instead of typical cubicles.
Personalizing details such as these will give your client the special attention they’re looking for in order to visualize themselves in that space so they don’t look elsewhere.
Broaden Your Tool-Using Horizon
Technology is constantly changing, especially the tools that people use to tell their stories and enhance the overall experience of their designs.
A new one has probably popped up just now while you’re reading this!
Virtual and augmented reality have now become the norm and we are able to use these tools to provide depth and scale to our models.
Now, it is easier than ever for a project to come to life through the use of virtual reality tools such as Google Cardboard.
Using these, the story you are crafting in your presentation can allow certain views or spaces for exploration like never before. The user can decide what they want to look at next, creating their own journey through your curated space.
Any tool you use to further the experience will allow the client to feel immersed in the world you’ve created and bring value to your presentation.
When the design comes to life in the viewer’s mind is when the architectural rendering has worked the best.
Whether you’re a student or a professional wanting to bring your project to life, Immediate Entourage has easy, commitment-free membership options to fit any budget.
If you have any questions, please send us a message on our Facebook Page and you will receive a quick response!
Downloads for the Week of September 25th, 2017
Here in the Northern hemisphere we are approaching winter. But these people cutouts say “no, it’s summer. And we’re here to party.”


Technology is Changing the Game of Architectural Design


Technology is Changing the Game of Architectural Design
Technology is an incredible tool when it comes to architectural design. Stay on top of the game and take a look at the latest and greatest high-tech tools!
People with limited technical skills and artistic ability are now able to use some of the easiest architectural design tools. Thanks to continuing technological breakthroughs.
Rumor has it, even the most advanced high-tech tools are becoming more user-friendly.
Meaning … anyone will be able to create their own complex architectural designs. Now, I’m not sure how professional the results will be if you’ve no artistic creativity. Still, it’s an interesting thought. If you like mastering new tools, why not?
Just a heads up…
Architectural design is also called architectural rendering/visualization/illustration or photo-real rendering.The community quite often refers to themselves as “Archviz.”
Archviz members are typically artistic. Many are trained architects. They’re also tech.savvy due to the use of computer technology that’s at times, complex.
However, today there’s a high-tech. architectural design tool for everyone…
But beware, they still take some mastering!
Photoshop CC 2017
Photoshop has been a popular choice to enhance designs and photos for many years. The 3D part of their product is easier to use than traditional 3D software so it’s a great choice if you’re a beginner.
- This is an Adobe product…Their 3D model part of the software package is why it fits into the architectural design category.
- Creates 3D images in minutes whereas traditional 3D software takes hours.
- To purchase a package including the 3D, the cost starts around $20 per month. But you’ll only get two “assets”(one being 3D) for that price.
- Only effective on a fairly powerful PC.
- Ongoing support team if you run into trouble.
- Popular uses include enhancing office presentations.
- Adobe is a trustworthy standard and industry leader for this type of software.
- Raster files. (RAW, JPEG, PNG, or even TIFF) Also known as BITMAP files… More on the importance of this in a moment.
Illustrator CS4 & CS5
It’s much easier to draw images in Illustrator than Photoshop. But, it can be a little temperamental. For example, draw a line and look at the preview. Then you find it appears on the screen in a different place.
- Another Adobe product.
- Monthly cost around $20 minimum.
- Construct the 3D image in Illustrator and color in Photoshop.
- Vector files.
So, why would you choose Illustrator over Photoshop?
The answer is in the raster vs. vector files…
You see, raster files don’t re-size well. Think of your cherished family photo. If only it wasn’t more than the size of a large postage stamp. You want to make it larger but it becomes distorted, fuzzy. There’s no remedy to your dilemma.
That’s because raster files are made up of pixels. (Like the tiny blocks that display on your computer.) This enables blending of tones, shading and more.
Whereas, vector files re-size perfectly no matter how large or small you make them. Think of say, a logo with a sweet 3D photo style image designed by you. No matter whether it’s a business card or a billboard in Times Square, the image will be crisp.
Vector files are made up of lines, not pixels. So, any work you do requiring multiple sizes is best prepared in Illustrator.
Next up…
Sketchup
If you’re not much for drawing, but like to be visually creative, check this one out. Sketchup has an inventory of just about any model to work on. Seriously … chairs, plants, people, or anything else you can think of…
- A Google product
- Simple to use – Pros use this, so can beginners.
- Ability to turn your model into a document or drawing.
- A 1-time license fee of about $700 with annual maintenance fee as well.
- There’s also a free non-professional version to download.
Rhino 3D
Rhino 3D is easy to use and wonderful if you’ve got some drawing skills.
- Just like drawing a concept on a page, except digital.
- Works fast with an ordinary computer.
- Reputed to be the world’s most versatile software for 3D model design.
- Creeping up to $800.
Maya
Maya is best known for animation software. If you’re a budding film or video maker, check it out…
- An Autodesk product.
- Academy Award winner for technical achievement for the movies’ Avatar, The Girl with the Dragon Tatoo, Spiderman, and more.
- I picked these very different movie examples to show you, with Maya, the sky’s the limit.
- The basic annual fee runs at around $1,500 which is nothing if you plan on winning a few Academy Awards.
Let’s take a breather while I dream of my Academy Award…
No, really!
Okay, on to a couple more Autodesk products…
AutoCAD Architecture
If you’re into detailed and meticulous projects, AutoCAD could be your choice.
- Interactive software allows for mimicking real life. For example, draw a door and make it open and close.
- Works well with other software including Photoshop to achieve the highest quality render.
- Respected for decades as the flagship Autodesk product. (Of course, with upgrades.)
- Designed specifically for architects to make laborious jobs easier.
3ds Max
If you’re looking for architectural design software that operates well with other rendering software, 3ds Max is a worthy option.
- Can be used with Adobe Photoshop for the ultimate high-quality render.
- Closely resembles AutoCAD and works well with that software. But, 3ds Max mostly takes care of the 3D rendering and animation aspects/needs of the construction project.
- Used by many game developers, TV and film studios due to its versatility and outstanding end product.
We’ll finish with…
Lumion 3d
If you like to share your work like a social media butterfly, Lumion 3d has you covered.
- It’s able to create the render in just a few minutes. But, you must design your 3D model using other software like Revit or Sketchup and import it to Lumion.
- Populate your model with plants, people, buildings, weather and more.
- Turn your images into a 360-degree panorama.
- Share the link to your image… Architectural rendering with a touch of social media!
What about a touch of Virtual Reality (VR) to complete your architectural design?
Currently, architectural design with VR still requires a lot of technical knowledge. Product developers are working to make this type of software more user-friendly.
Just something to keep an eye on.
If you’ve got a favorite tool, let me know what you love about it in the comments…
Downloads for the Week of September 11th, 2017
Another week of building textures. Press your face to the screen; feel the texture.


Downloads for the Week of September 4th, 2017

Some great cutout downloads for end-of-summer renderings.


Downloads for the Week of August 28th, 2017
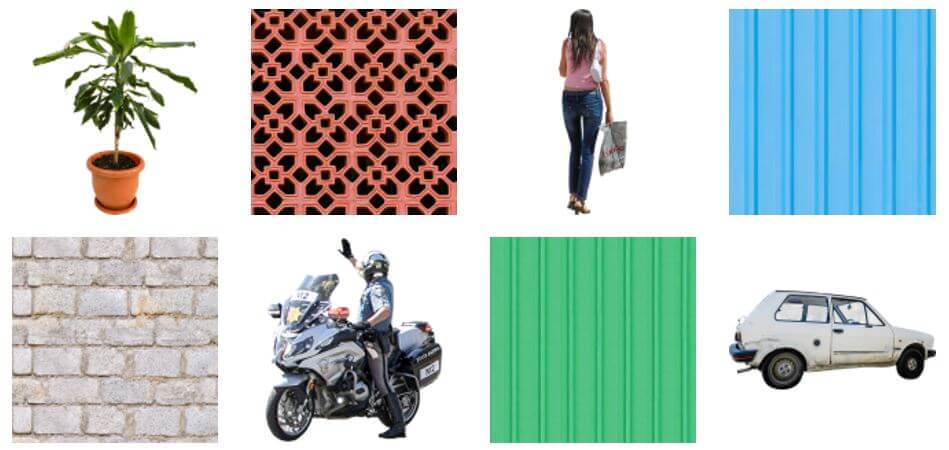
And we’re back with a little of everything. An odd collection of textures and entourage that one could only describe as your weekly delivery of digital files consisting of pixels arranged deliberately.


Downloads for the Week of August 21st, 2017
All great tiling building material textures today; give them a go in Sketchup!


Downloads for the Week of July 17th, 2017
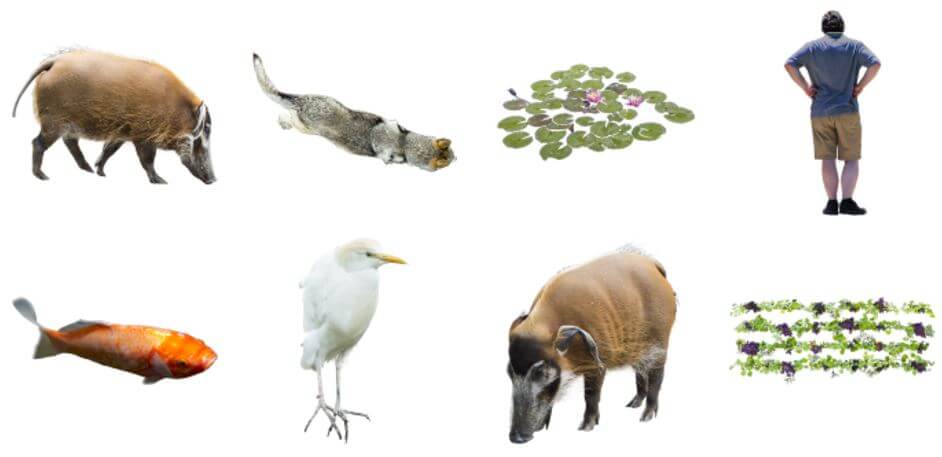
We went hog-wild with the cutouts this week! Okay, okay… bad joke. Now I sound like a boar…


How You Should Be Using Photoshop for Architecture


Creating impressive architectural rendering lies in the details. We’ll tell you how using Photoshop for architecture design can take your work to the next level
Photoshop for architecture can help turn the rendering of a house into a home.
Adding images of people, animals, and objects to your rendering can bring the entire project to life.
Including pictures from “real life” gives context, texture, and depth to a rendering.
Pictures tell a story. Stories sell the project.
Using Photoshop with skill can also help architects attract clients and keep existing clients happy. By using Photoshop to illustrate your vision, you will be better equipped to manage and grow your architecture business.
Real Life Renderings
No matter how well done, a two-dimensional picture always requires a leap of imagination.
Even a 3D rendering can seem like a cardboard miniature of the project in question.
Ultimately, the architect’s rendering has to be approved by the client: the developer, homeowner, or business proprietor. That client has to be able to imagine what the rendering will look like in real life.
They have to be able to envision where people will walk, where they will park their cars, and where the sunlight will hit.
By using Photoshop for architecture, you can better convey the sense of place you envision for the project. It helps the client see what the architect sees.
Photoshop for Architecture: Easier Than You Think
Industry leaders recommend Photoshop as the most important piece of software for architects and architecture students to learn beside their main CAD or 3D program.
There are lots of tutorials online to guide architects on how to use Photoshop in their renderings. These videos will guide you through the process step by step.
Why Bother with Photoshop when I have my 3D program?
Photoshop for architecture takes rendering into another dimension. It creates visually arresting imagery which makes the architect stand out from the competition.
Whether it’s a classroom presentation or a business pitch, an impressive presentation can be key to closing the deal.
This house may never be actually built in Iceland, but setting its rendering there certainly gets your attention.
While 3D programs may add the technical “wow” factor, photos of people appeal to the emotion. They add the heart.
Add People to Your Pictures
Architects often add figures to their renderings to show scale. However, placing realistic photos of human beings living in the architectural landscape brings an added emotional dimension.
A photograph of a smiling teenager shopping at the mall in the architect’s mock-up of the mall project does more than place a person in the picture. It illustrates who will be using that environment.
It can also appeal to the client on a subliminal level.
If your architectural rendering includes faces from your client’s target audience, you are helping the client envision a successful project.
Many online sites offer cut-out imagery which can enhance your renderings and appeal to your target audience.
Day and Night
Photoshop also helps you easily depict your rendering at different times of the day.
Alex Hogrefe has been called the “the architect’s visualization artist.” He offers online tutorials on how he has created dramatic stories in his renderings through a variety of innovative techniques.
Hogrefe uses Photoshop for architecture to show renderings of buildings at all times of day and night and also in different types of weather.
Adjusting the context of the project enables prospective owners and clients envision the building in all kinds of conditions.
It also helps with practical concerns like how to design the lighting.
Photoshop Helps Architecture Clients See What You See
Architects see the world spatially: they can look at a room and envision how it would change with a window added there, or a wall removed there.
Most of us do not see space in this way: that’s why we rely on architects.
I knew my family needed more room, but I could not imagine how to achieve that on a limited budget. I would never have agreed to spend my hard earned money on demolition until my architect showed me renderings.
The pictures my architect showed me told a story: my children could be playing while my husband and I enjoyed wine on the back veranda. My mother-in-law could be taking a nap in the guest room while the rest of the family cooked in the expanded kitchen area.
Pictures of people injected life into the proposal.
Cut-outs of people, pets, and other fun details can be found online and added easily into your renderings using Photoshop.
A Way to Help Your Clients
For commercial projects, architectural renderings must do more than touch the clients’ emotions.
They must guide the construction.
They must also help the marketers. When condos are sold in advance of construction, it is often on the basis of a convincing rendering.
Your Photoshopped renderings of the project can help a real estate developer convince others to buy his property.
Show the sun setting behind the apartment complex.
Show the foot traffic going past the retail space.
Help the property owner illustrate her project in the best possible way, and you are more likely to get a call again when the developer decides to embark on a new project.
Kick it up a notch. Use Photoshop in your architectural renderings.
Photoshop and other tools are revolutionizing how architects do their renderings, and the techniques continue to grow.
In the fierce competition for clients, both individual and corporate, an architect has to make a strong and impressive impression.
In a side by side comparison of one rendering made using Photoshop and one without, there is really no comparison.
You have a better shot at getting the job if you add elements of life like people, pets, cars and activities.
Show a prospective client how their project will function in the real world, being used by real people in real time and real weather. It can improve your chances of getting the job.
Once you get the job it can help you anticipate challenges and design around them.
It’s easy to explore the many ways Photoshop for architecture can help you add life to your renderings.
Go For It!
Photoshop for architecture will show your clients how their projects will be used in real life and help them market their buildings to their target audiences.
So go for it! Start using Photoshop for architecture.
Downloads for the Week of June 19th, 2017

A collection of cutout items you might find in a house- download away!


Downloads for the Week of June 5th, 2017
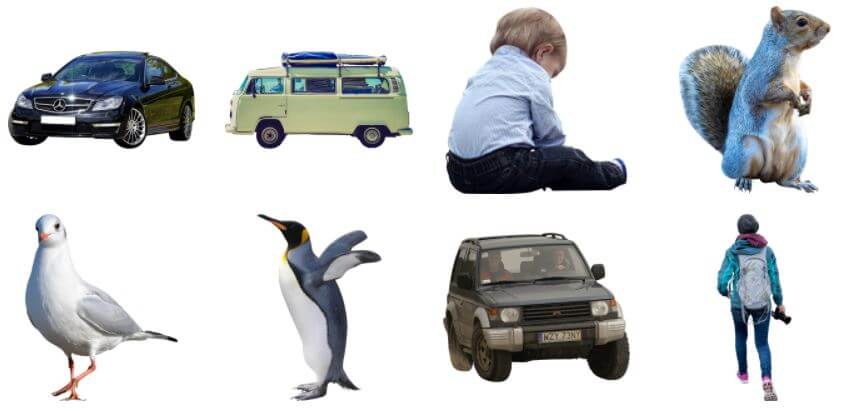
Birds, cars, and babies! This week’s collection is finally thawing out from a long winter.


Downloads for the Week of May 15th, 2017
A fairly basic but trustworthy collection of cutouts this week. Get them while they’re digital!

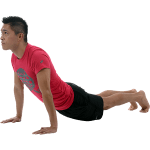


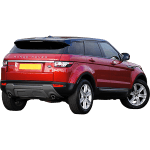

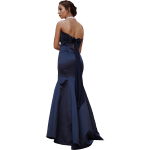
Downloads for the Week of May 8th, 2017
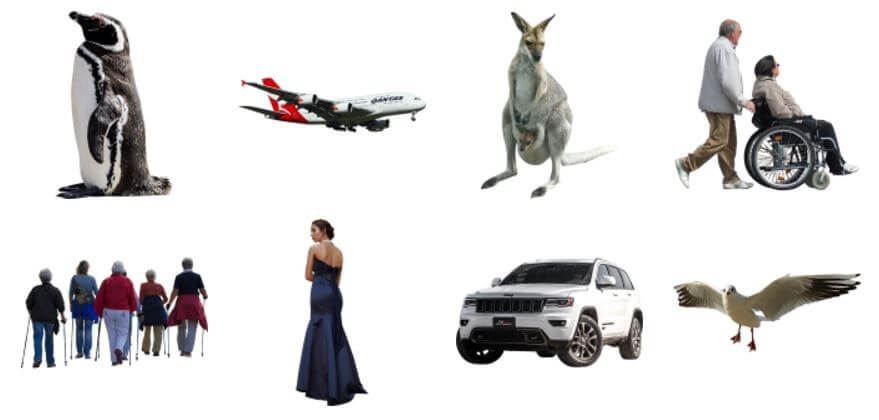
A kangaroo, a jet plane, a woman in an evening gown… it seems this week’s cutout downloads are made for a perfume commercial. Enjoy 😉


Downloads for the Week of May 1st, 2017
You know what they say, April showers bring May flowers. I don’t have any flowers for you this week. I blame April.


Downloads for the Week of April 17th, 2017

Tax season is just about behind us, so check out what new downloads for this week you can claim for yourself!


Downloads for the Week of April 10th, 2017

April showers bring May flowers, and new cutouts for your collection…


Downloads for the Week of March 20th, 2017
New cutouts for this week; just click below and start downloading!


Downloads for the Week of March 6th, 2017
Get them while they’re hot! Eight new textures to add to your library.


Downloads for the Week of February 27th, 2017
Here are this week’s fresh graphics for your use!


Downloads for the Week of February 20th, 2017
It may be a cold, February week… but that’s not stopping these new cutouts!


Downloads for the Week of February 13th, 2017
Who’s got two thumbs and a batch of new downloads for this week? You do! Unless you don’t have two thumbs-if so, my bad. I didn’t mean to exclude anyone. Still friends?